
Power Automate has a great approval mechanism that can be accessed from within the Power Automate portal, Power Automate Mobile app, Microsoft Teams, and you favourite email client. However, there are times when you may want to provide approvals in another system while keeping the Power Automate approvals up-to-date.
Consider the scenario where you have an app (Power App, SharePoint list, or any other app for that matter) that generates approvals and you may want to have approvers go into that app to provide approvals as well as letting them do the approval as part of Power Automate. Let’s assume SharePoint is used as the data storage in this scenario.
In this scenario, the flow could be configured to update the SharePoint list with the approval status so that the approver can see inside the app what the outcome was. But if the user were to approve the item in the SharePoint list, there would be no update to the workflow. The user (or another approver) could still action the approval in Outlook, Teams, or Power Automate. This would result in multiple approvals for the same event. No good!
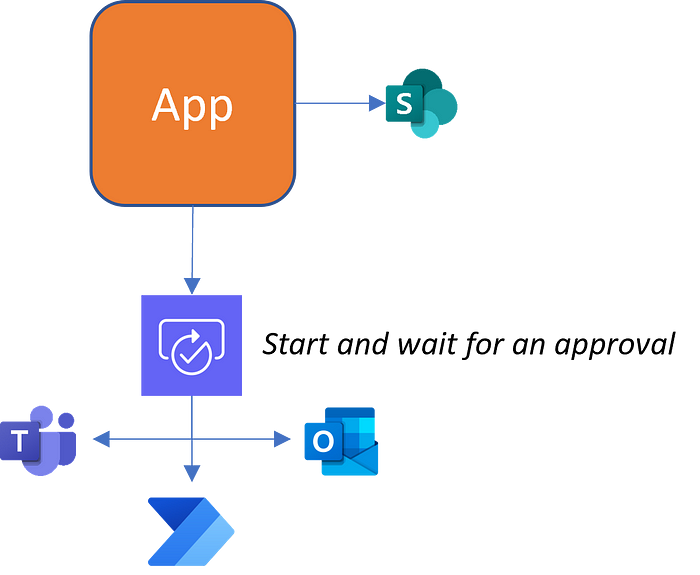
One way around it is to use the Create and approval and Wait for an approval actions. There are a few key differences that are required in the process.
- Create an approval is used to kick-off the approval
- The Approval ID needs to be stored somewhere (e.g. SharePoint list)
- A second workflow is needed to wait for the approval to complete using the Approval ID captured in step 2
- Another workflow is needed to capture the event of the approval happening in the app in order to cancel the approval process
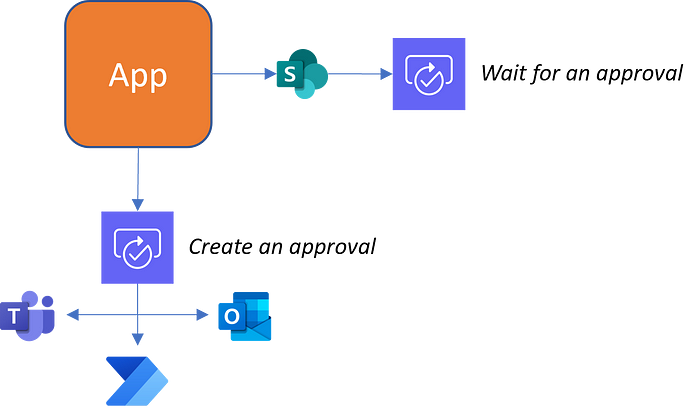
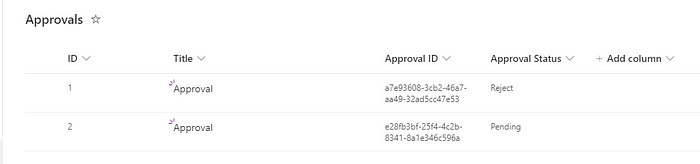
Let’s look at the solution in more detail. In the scenario below, I’m using a SharePoint list as my storage for the approvals. All I really care about is the Approval ID.
Starting the approval
As mentioned in steps 1 and 2, the process begins by invoking a Create an approval action and storing the resulting Approval ID in a data source.
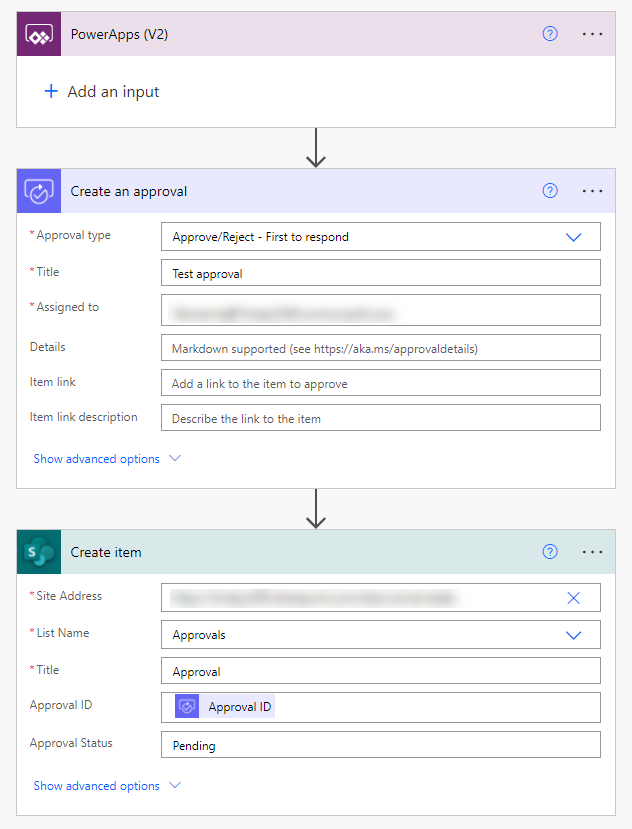
In this case, the data source is the SharePoint list.
Waiting for Approval
Once the approval has been initiated and the Approval ID is known, it can be used to wait for the approval. For simplicity, I’m using a workflow that is triggered by the SharePoint item creation itself (step 3).
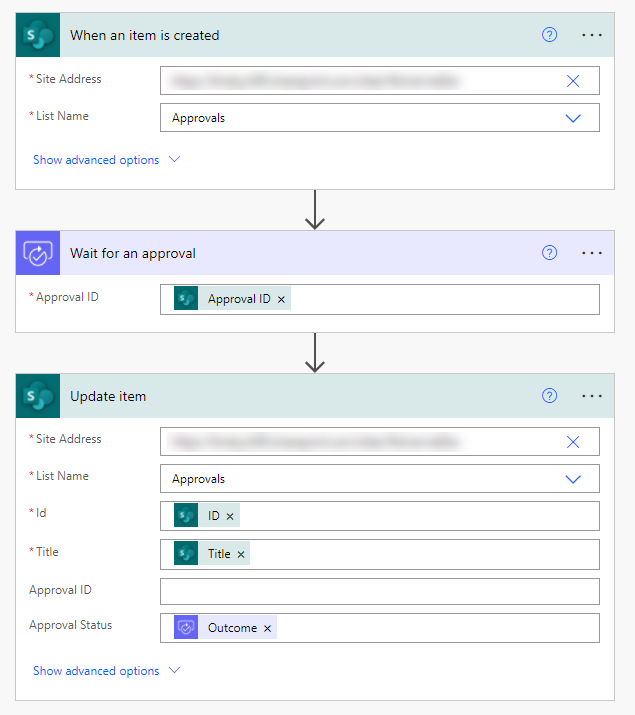
This workflow will run for up to 30 days and update the SharePoint item with the status once completed. So far, the solution is not much different from the Start and wait for an approval approach. The next flow is where things get more interesting.
Canceling an event when approval is granted via the App
As mentioned in step 4, another workflow is needed to capture the approval outside of the Power Automate workflow, and cancel the request itself to avoid duplication of approvals. Internally, approval data is stored inside Dataverse in the Approvals table. By knowing the Row ID (Approval ID), the status of the approval can be changed without directly interacting with the approval request. Therefore, in this workflow, it is important to not only mark the approval status in the SharePoint list, but also use the Dataverse Update a row action to change the Stage, Status Reason, and Status of the approval request.
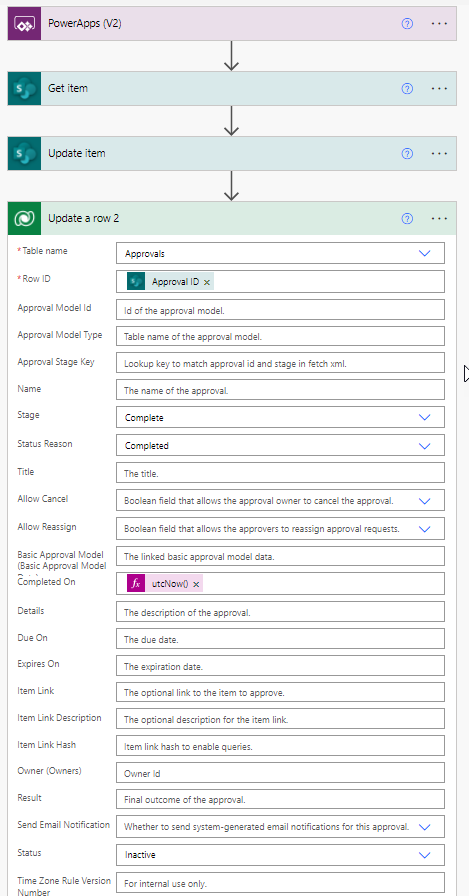
Once the action completes and an approver attempts to invoke an approval, they message will change to show the stage based on this update.
Conclusion
The solution provided in this article is one alternative approach for dealing with Power Automate approvals that may need to take place in multiple systems.
Originally published on Medium
